Bénéficiez d’une visibilité complète grâce aux tableaux de bord en temps réel, aux alertes et aux capteurs personnalisables
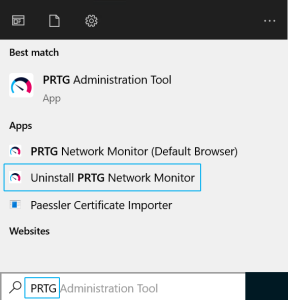
1. Ouvrez le menu Démarrer de Windows et tapez "PRTG".
2. Cliquez sur Désinstaller PRTG Network Monitor.
3. Confirmez le contrôle de compte d'utilisateur de Windows avec Oui pour autoriser la désinstallation du programme.
4. Dans la boîte de dialogue de désinstallation de PRTG Network Monitor, cliquez sur Oui pour confirmer que vous souhaitez supprimer complètement PRTG de votre système.
5. Le programme de désinstallation vous invite à sauvegarder votre base de données PostgreSQL. Si vous souhaitez conserver l'historique de vos données de supervision, sauvegardez la base de données maintenant, puis cliquez sur OK pour continuer.
Remarque : la désinstallation supprime également PostgreSQL de votre système.
6. Patientez pendant la désinstallation de PRTG.
7. Pour terminer la désinstallation de PRTG, votre système doit redémarrer.
Cliquez sur Oui pour confirmer le redémarrage du système.
Après avoir redémarré votre système, PRTG est supprimé. Il reste encore quelques fichiers de données sur votre système que vous devez supprimer manuellement pour terminer la suppression.
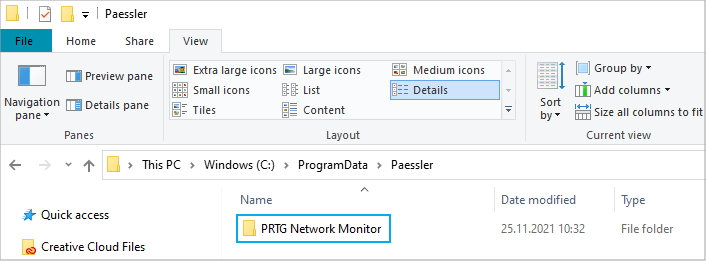
Supprimez le dossier du répertoire de données de PRTG :
1.ouvrez l'explorateur Windows et tapez %programdata%\Paessler dans la barre d'adresse, puis appuyez sur Entrée.
2. Supprimez le dossier PRTG Network Monitor en appuyant sur la touche Del.
Supprimez le dossier du répertoire du programme PRTG :
3. Dans l'Explorateur Windows, naviguez jusqu'àC:\Program Files (x86)\PRTG Network Monitor.
4. Supprimez le dossier PRTG Network Monitor en appuyant sur la touche Del.
Les alertes personnalisées et la visualisation des données vous permettent d'identifier et de prévenir rapidement toutes sortes de problèmes.
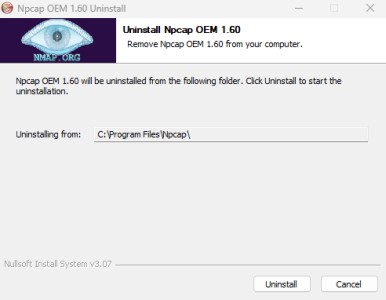
Lorsque vous installez PRTG, un composant appelé Npcap est également installé sur votre système. Après la désinstallation de PRTG, vous devez désinstaller manuellement Npcap.
1. Ouvrez le menu Démarrer de Windows et recherchez Apps et fonctionnalités (Windows 10) ou Apps installées (Windows 11), puis ouvrez-le directement.
Vous pouvez également ouvrir le menu Démarrer de Windows, cliquer sur Paramètres et sélectionner Apps.
2. Faites défiler jusqu'à et cliquez sur Npcap (le libellé exact peut varier en fonction de votre version de PRTG, par exemple Npcap OEM ou Npcap 0.9983) pour afficher d'autres actions.
Cliquez sur Désinstaller.
3. Confirmez le contrôle de compte d'utilisateur de Windows avec Oui pour autoriser la désinstallation du composant Npcap.
4. Dans la boîte de dialogue de désinstallation de Npcap, cliquez sur Désinstaller et attendez la fin du processus de désinstallation.