Ce guide pas à pas explique comment déplacer ou migrer une installation PRTG d'un ancien serveur vers un nouveau serveur. Le serveur peut être une machine virtuelle ou une machine physique. Les étapes suivantes sont valides
Si vous avez besoin de plus de détails ou d'informations plus approfondies sur la migration de PRTG, par exemple si vous exécutez PRTG dans un cluster, consultez notre article de la base de connaissances.
Bénéficiez d’une visibilité complète grâce aux tableaux de bord en temps réel, aux alertes et aux capteurs personnalisables
Pour réussir la migration d'une installation PRTG, assurez-vous que vous installez la même version de PRTG sur votre ancien et votre nouveau système.
Il se peut que vous deviez d'abord lancer une mise à jour de l'ancien système vers la dernière version de PRTG.
Si vous migrez PRTG d'un système 32 bits vers un autre système 32 bits ou d'un système 64 bits vers un système 64 bits, vous pouvez immédiatement passer au guide en 9 étapes.
Pour une migration d'un système 32 bits vers un système 64 bits, ou vice versa, veuillez suivre les étapes suivantes :
Remarque: il est important de sauvegarder votre système avant de manipuler le registre Windows !
Sur le nouveau système, vérifiez les informations d'identification du service du serveur central PRTG et du service de sonde PRTG. Veillez à utiliser le même compte pour les deux services que sur l'ancien système. Si vous avez utilisé des informations d'identification individuelles, les étapes suivantes sont nécessaires :
Remarque: le service du serveur central PRTG et le service de sonde PRTG s'exécutent par défaut sous le compte Système local. Cela peut entraîner des problèmes avec les capteurs de scripts, car dans certains cas, le compte Système local n'a pas accès au réseau ou à d'autres systèmes. Veuillez utiliser un compte disposant des autorisations nécessaires.
Après avoir préparé la migration, vous pouvez maintenant déplacer PRTG de l'ancien au nouveau serveur. Suivez les étapes suivantes :
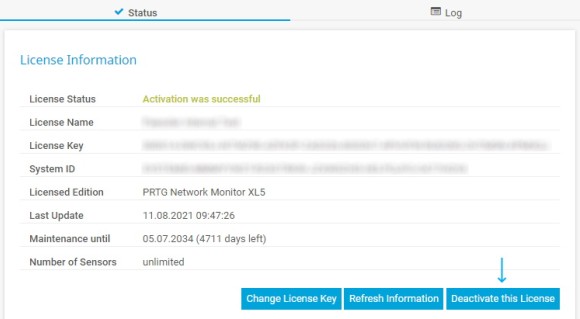
Sur votre serveur d'origine, accédez à l'interface Web PRTG et désactivez votre licence PRTG sous Configuration | Informations sur la licence. Sinon, vous ne pourrez pas activer la licence sur le nouveau serveur. Votre ancien serveur fonctionnera encore comme une version sous licence pendant 30 jours.
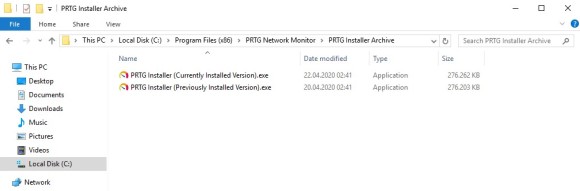
Installez sur le nouveau serveur la même version de PRTG que celle que vous exécutez sur l'ancien serveur, à l'aide du programme d'installation de l'ancien serveur. Par défaut, ce programme d'installation est stocké dans le répertoire de programme PRTG :
Lors de l'installation, vous aurez besoin de votre nom de licence et de votre clé de licence.
Les alertes personnalisées et la visualisation des données vous permettent d'identifier et de prévenir rapidement toutes sortes de problèmes.
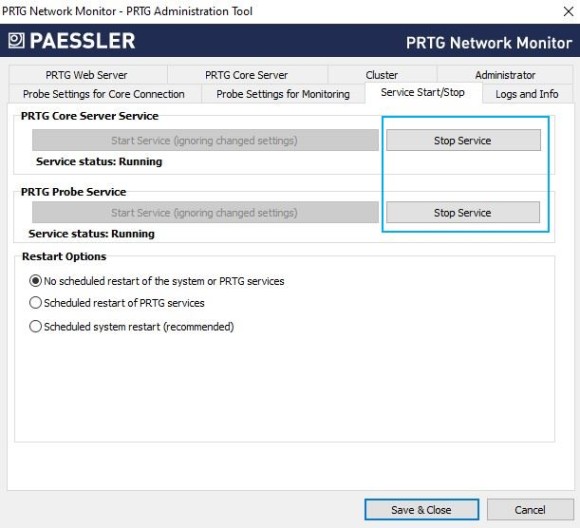
Ouvrez l'outil d'administration PRTG sur l'ancien et le nouveau serveur et arrêtez le service du serveur central PRTG et le service de sonde PRTG sur les deux serveurs.
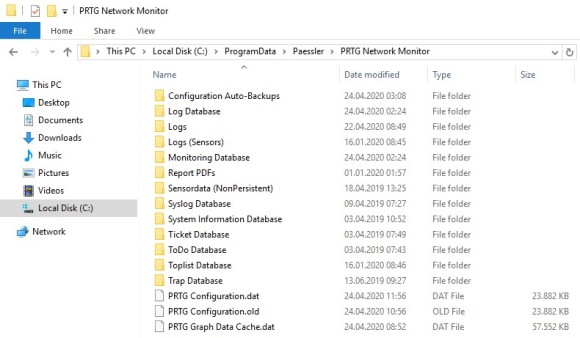
Allez dans le répertoire de données de votre ancien serveur et copiez le contenu de
sur votre nouveau serveur. Assurez-vous que les chemins d'accès aux fichiers correspondent.
Si vous utilisez des personnalisations telles que des icônes d'appareils personnalisés, des capteurs personnalisés ou des certificats, allez dans le répertoire de programmes de votre ancien serveur et copiez le contenu respectif sur le nouveau serveur également.
Après avoir copié toutes les données dont vous avez besoin, ouvrez l'outil d'administration PRTG sur le nouveau serveur et redémarrez le service du serveur central PRTG et le service des sondes PRTG.

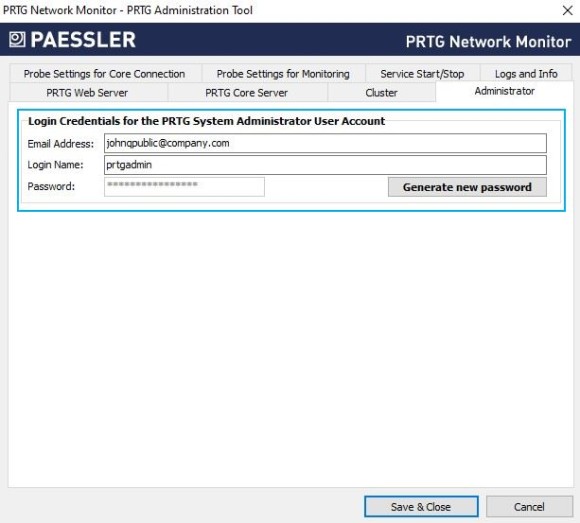
La migration rétablit les informations d'identification du compte Administrateur système PRTG avec le nom d'utilisateur et le mot de passe par défaut, prtgadmin.
Nous vous recommandons vivement de modifier les informations d'identification dans l'outil d'administration PRTG du nouveau serveur dès que possible.
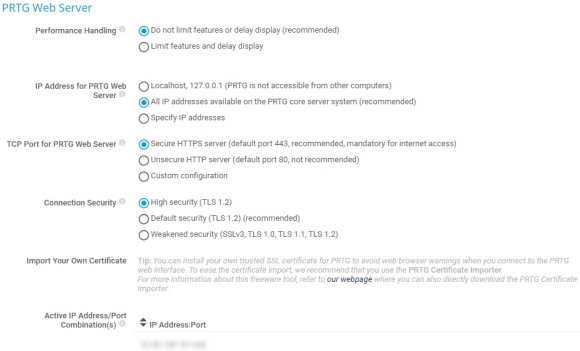
Pour le serveur web de PRTG, vérifiez l'exactitude des paramètres du serveur web de PRTG, comme le port TCP sélectionné et les adresses IP spécifiées.
Vous pouvez le faire dans l'outil d'administration de PRTG ou dans l'interface Web PRTG sous Configuration | Administration du système | Interface utilisateur.
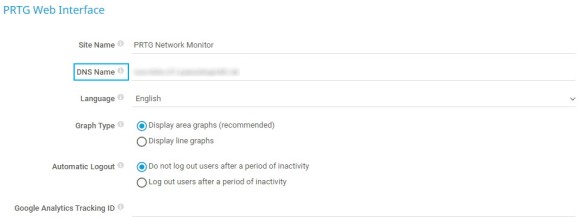
Dans l'interface Web PRTG, allez dans Configuration | Administration du système | Interface utilisateur, section Interface Web PRTG.
Saisissez le nom DNS de manière à ce qu'il pointe vers le nom de domaine entièrement qualifié (FQDN) du nouveau serveur.
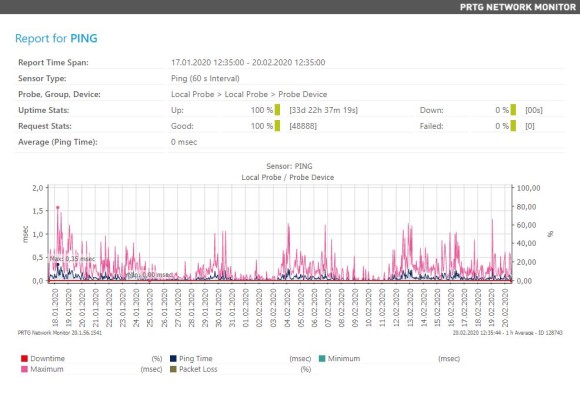
Enfin, vérifiez que tous vos capteurs se comportent comme prévu. Un rapport sur les données historiques peut être utile pour confirmer que toutes les données historiques requises sont disponibles.
Pour le rapport, cliquez avec le bouton droit de la souris sur un capteur, allez dans Données historiques | Afficher les données historiques, entrez votre période de temps et cliquez sur Démarrer.
Et le tour est joué ! Vous pouvez désormais utiliser PRTG sur votre nouveau serveur comme à l'accoutumée.