![]()
How to manually set up
your device tree in 3 easy steps
As a system administrator, you want to monitor all your devices, but you want to build up your own device tree in PRTG instead of using the auto-discovery? Then you have come to the right place.
This how-to guide will give you all the important information that you need to create your very own device tree from scratch.
Before you install and run PRTG, think about the
IT infrastructure that you want to monitor
Ask yourself questions like the following:

Where are your devices or applications located?
In the same network as your PRTG installation or in other local networks? Are they on-site, in a branch office in another city or country, or on another continent? Draw a map. This will help you to decide how many probes you need and how many remote probes will be part of your device tree.
Do you have devices or applications that share the same configuration or settings?
For example, do parts of your network use the same SNMP credentials or do bundles of applications need a certain Active Directory account? Think about how many and which groups you could create in the device tree to inherit configuration or settings information to all dependent monitored items.
Who is responsible for what
in your IT team?
Who do you have to grant access to certain locations, parts of networks, devices, or applications? This will help you to define dedicated groups to which you can assign according access rights that are inherited to all dependent monitored items.
With a sound plan at your hand, you can now
proceed to setting up your device tree
![]()
Download and install PRTG Network Monitor and disable the auto-discovery
![]()
PRTG automatically installs a probe for your local network, the local probe.
![]()
For every remote location or independent local area network, install a remote probe.
If you have come to this point, you have a basic
device tree with 2 hierarchy levels:
![]()
Root group level
The default root group level, the highest level in the object hierarchy of the device tree
![]()
Probe level
The probe level, with at least the local probe, and with remote probes you installed
Now add the third level: the groups
You have two options to add groups and the subobjects
of a group in the device tree (further subgroups, devices, and sensors):
Option 1:
Add your groups and all subobjects completely manually. After adding your groups, you also have to manually add devices, before adding the sensors you need.
Option 2:
Partially automate the creation of groups and subobjects by adding auto-discovery groups. Specify IPs or IP ranges and necessary credentials for the auto-discovery, and PRTG automatically adds devices with suitable sensors, if found. If you want to customize the auto-discovery, first check out how the auto-discovery works.
Always remember that the device tree in PRTG has a hierarchical structure that implies the inheritance
of properties from objects that are higher in the hierarchy to objects that are lower in the hierarchy.
Do not forget to set up notifications and notification triggers to always be alerted if there are any issues.
Tip: Check out the various graphical representations of the device tree!
Whenever your network changes and new devices or applications are added, just repeat the steps described in this article.
If you want to completely automate scanning for new devices and setting up your monitoring, you can define a regular schedule for auto-discoveries. For example, scan your network, or parts of it, every week or every few weeks, day or night, during weekdays or on the weekend, just like your resources allow it.
Two examples of structuring a device tree
Example 1
This is an example device tree part that reflects the monitoring of virtual ESXi hosts.
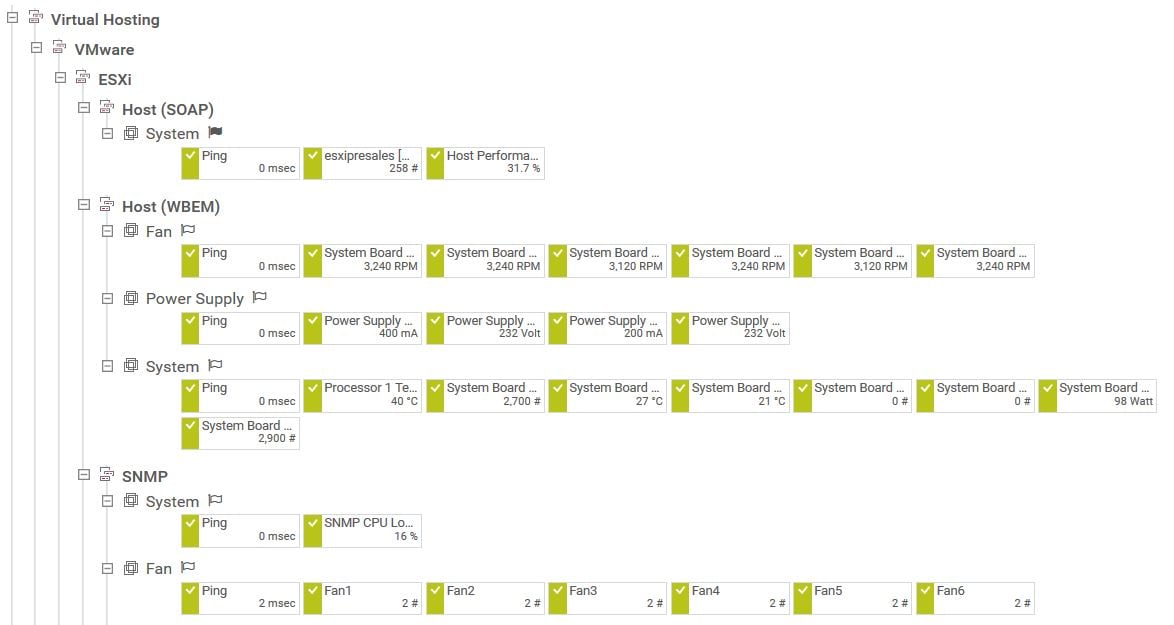
The ESXi group is a subgroup of VMware and Virtual Hosting and inherits the VMware credentials from the VMware group.
The ESXi group has several subgroups that are organized according to the used technology: SOAP, WBEM, and SNMP.
All these subgroups inherit SNMP credentials and SNMP compatibility options from the ESXi group, because SNMP sensors are not only used in the SNMP subgroup, but potentially also in the WBEM and SOAP subgroups.

Example 2
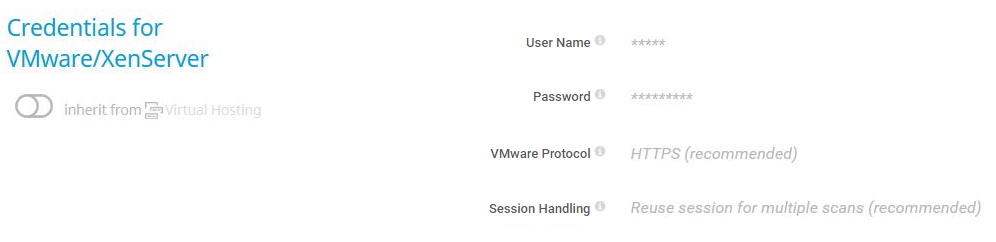
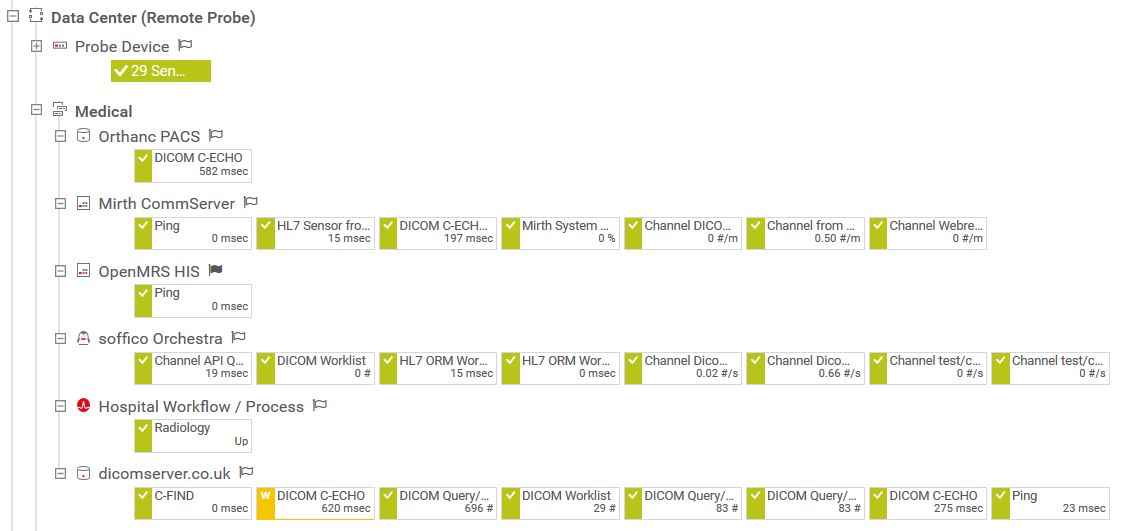
In the following example, the Medical group comprises various monitoring technologies from different vendors of the healthcare sector.
Because the Medical group has independent system administrators in charge, it is a quite independent group in the device tree. Settings like Credentials for Windows Systems, Credentials for Linux/Solaris/MacOS (SSH/WBEM) Systems, Credentials for VMware/XenServer, Credentials for SNMP Devices, Credentials for Database Management Systems, and Credentials for AWS are inherited to all devices directly from the Medical group without any subgroups in between.
The possibilities to build your own device tree with PRTG are unlimited. All you have to do is think in advance about how your device tree will best fit the structure of your company and how it can make your work easier.
This how-to guide only scratches the surface?
Get more deep-dive information here!
Get more deep-dive information here!